


Rope rescue operations involve multiple skill sets put together to accomplish the incident’s objectives. There are anchors, main line systems, belay lines and systems, patient packaging techniques and devices — all combined during the rope rescue incident.
Each of those components is practiced individually and collectively during training so that the responders are properly prepared when the call for service happens.
Unfortunately, the edge transition phase is one critical part of a rope rescue operation that is often missing from the training. This is probably one of the most difficult and challenging pieces of the entire operation, especially when working in remote areas and when there are no high points to make the transition easier.
I have observed trained teams take an excessive amount of time during this phase as well as seeing victims being handled in ways that do not promote quality patient care. When questioned on this, many responders have replied that it was the only thing they could do or that they had no other options.
Both answers are inaccurate. There are other ways to do it, and those options require one, often missing, critical piece of the puzzle — proper preparation and training for the edge transition phase.
Do you or your agency put quality time into training and practicing for the edge transition phase of your rope rescue operations? Usually, the honest answers are not very much, and more often, not at all.
Remember, this person has experienced one trauma, which is why we were called. We do not want them to experience a second trauma due to our inability to properly and efficiently provide the services we promised.
First and foremost, take the time to develop and reinforce the individual and group skills for this component of the rope rescue operations. In other words, practice. Make edge transition one of your team’s formal training units.
Equipment rigging
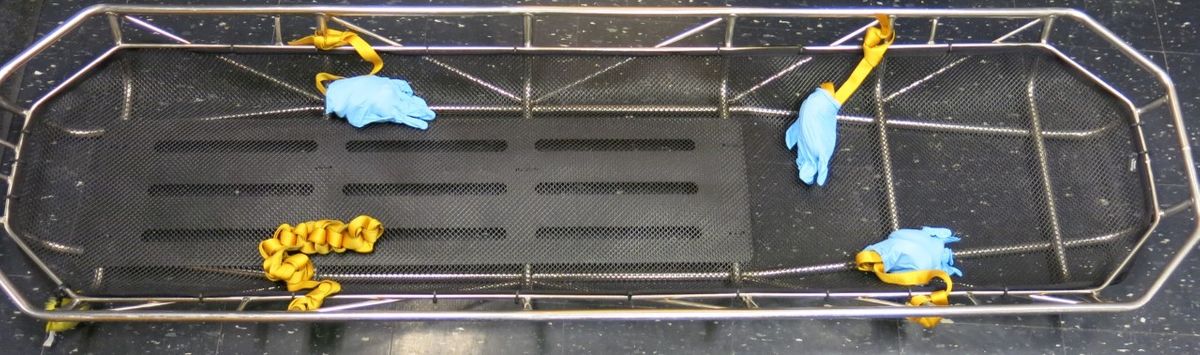
Minor rigging adjustments to the litter or transport device is a great start. We use four sections of webbing placed at the four corners of the packaging device, attached approximately 1 foot up from the ends on both sides of the litter.
Use straight lengths of webbing for this application (sewn loops limits the lengths needed in this example). Lengths can vary depending on the materials you have available; we use 20-foot sections on each corner for our litters.
The webbing can be attached to the litter in a couple of ways.
- Tie one end of the webbing to the uprights with a clove hitch and then safety the hitch.
- Tie a loop in the end of the webbing using a frost knot, then put the webbing around the upright on the litter and pull the other end of the web through the loop, girthing it to the upright.
(Photo courtesy of Bob Duemmel)
Each agency can decide how best to store the webbing when not in use. Over the years, I have become less a fan of chaining webbing in pre-rigging situations. If we have four people chaining four pieces of webbing, we always seem to have two or more versions in hand when we are done with the task.
If you come from an environment where everyone does it the same every time, I envy you. I have never run into that situation in over 30 years.
Remember, speed comes from efficiency. Whatever we can do to minimize steps in a process equals a more efficient operation.
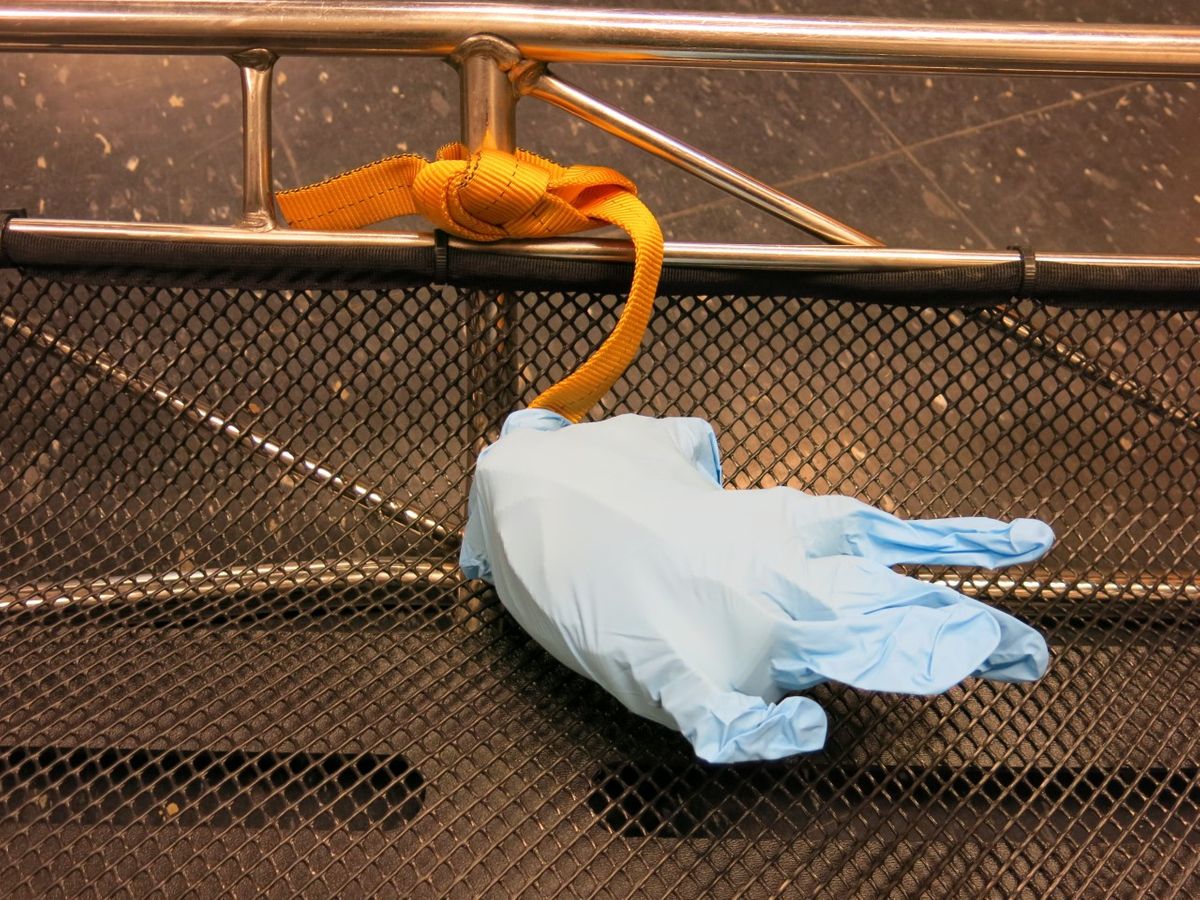
Some tricks of the trade that have worked well to replace chaining the webbing include using old blood pressure cuff bags, using rubber bands, and one of my favorites, using an EMS glove to collect the webbing not in use.
If you can pre-rig your litter and have traditionally placed the bridle for a vertical operation on the litter, the same can be done with the four lengths of webbing. This improves operational efficiency by having as much of the equipment pre-rigged as possible prior to arriving on scene.
If you cannot pre-rig your litter, the best option is to have the four pieces of webbing dedicated to this task with the other items you will be using to rig the litter.

(Photo courtesy of Bob Duemmel)
Edge transitions
These sections of webbing are valuable when sending the litter over the edge as well as during its recovery. It is also important to practice working with a loaded litter in both directions (during a victim lowering and victim raising operation). Remember, we are not always working in one specific direction.
These processes can be used on a flat edge (90 degree) or in situations where you have a parapet wall or other structures to come over.
Responders must remember that once the attendant is recovered from the litter, the victim is left unattended. This is a critical moment of your operation and should be completed in as quick as possible.
For a litter being recovered during a haul in a horizontal posture, there are three key steps.
First, once the litter has been raised as high as possible (usually when the hardware or knots of the system hit the edge rollers), the attendant hands four sections of webbing to responders at the top edge. These responders should be tethered off for their own safety when working near live edges.
Second, the attendant is recovered first. Remember to have the attendant lengthen their main line and belay line attachments as applicable so that they have enough length to make the transition over the litter and safely onto the top deck.
Finally, the litter is lifted at the command of the edge person using the four webbing sections. It’s then placed on the hard deck or handed off to others for transport to EMS providers.
By using this method, the weight is divided among four individuals, which helps promote a rapid recovery and transitioning the victim to additional care. While it is not a complex maneuver, it does take practice to become proficient in the process.
(Photo courtesy of Bob Duemmel)
Four steps for three rescuers
An alternate method is to use a lever to assist in lifting. You can use 4x4 lumber, metal pike poles, or our primary tool of choice — a folding attic ladder. Most agencies have these ladders on their apparatus and they are easy to transport to the scene.
The following four-step method helps when tight locations do not allow for four responders to be close to the edge and when staffing is light.
First, once the ladder is opened, place a section of webbing on the foot end to use as a safety strap in the event the individual handling the ladder (or any of the items chosen) loses their grip. This will prevent it from falling to the area below or hitting the attendant and the victim that are suspended below the edge.
Second, place the head of the ladder between the litter and the face of the wall or surface the litter is coming up. Lower approximately one quarter of the length of the ladder (enough to fully cover the width of the litter once under it) below the edge of the litter rail.
Third, use the top edge as a fulcrum and allow the ladder to help lift the basket while using the same lifting method mentioned in the initial example — using the sections of webbing to also lift the litter.
Finally, the edge person issues lift commands so that a controlled transition is accomplished with all responders working in unison.
For a vertically rigged litter, the webbing provides similar advantages by giving the top side responders points of contact that allow them to work together in bringing the basket over the edge.
Webbing is handed up by the attendant prior to being brought up over the edge. Because the foot webbing is below the attendant’s reach, it helps to extend the webbing during packaging. Tucking the sections at the victim’s shoulder level allows the attendant to quickly access the webbing sections.
Once the attendant is retrieved, the litter can be lifted up and over the edge using the webbing section to assist with the lift.
Two options exist for the final lift.
- Lift the litter straight up and tilt inward once it has passed it center of gravity; bring it the rest of the way in a horizontal posture.
- Using the foot sections of webbing, pivot the litter from a vertical to a horizontal position. Lift the litter over the edge using all fours sections of webbing to share the weight of the load.
No matter what methods or devices you choose to accomplish your edge transitions, you must practice these skills to become proficient and to provide the highest level of care possible.
